Menu
Showing posts with label 0-10. Show all posts

Great Pizza Snacks to help curb those pizza cravings or just finger food or H'orderves for a get together.  These ended up being fairly easy to make and were quite tasty.
These even lend themselves to being more creative by adding in some peppers, black olives, onions, maybe even some spinach and other items! The sky is the limit! What would you like on your pizza bites?
For these ones I put a few pieces of mushrooms and yellow pepper.

Servings: 12 Snack bites
Ingredients:
  • 60 g shredded cheese
  • 1 Egg
  • 66 Slices Pepperoni
  • 1/2 tsp Oregano
  • 1/2 tsp Basil
  • 2 Tbs Pizza Sauce
Directions:
  1. Warm the pepperoni up slightly as it makes it easier to fit into the smaller muffin tins.
  2. Place 3 pepperoni slices in each section of the muffin tray.
  3. Mix the cheese, egg, basil and oregano.
  4. Divide the cheese mixture equally in the muffin cups
  5. If you are adding in vegetables, add these on top.
  6. Bake for 5-7 minutes at 450 degrees F.
  7. Let sit for 3-5 minutes before pulling the pepperoni cups from the tin.
  8. Place a dollop of pizza sauce on each cup and enjoy!

Nutrition Facts
Serving size: 1/12 of a recipe (0.8 ounces).
Amount Per Serving
  • Calories 76.51
  • Total Fat 6.78g
  • Sodium 242.48mg
  • Total Carbohydrates 0.89g
    • Fiber 0.05g
    • Sugar 0.02g
    • Sugar Alcohols 0g
    • Net Carbohydrates 0.84g
  • Protein 1.72g
0

Yes, This is a common recipe with a lot of controversial views. I am actually one of those people that HATE mashed cauliflower. But I watched a few videos on what everyone does to make theirs and figured I’d try it again.
It honestly did not turn out bad this time. In the past when I tried to make this, after a few bites, I couldn’t take anymore with out wanting to toss it across the room.  This time, it was great. There are a few things I did that I haven’t seen on other peoples recipes for it.
Maybe it will work for you.
Ingredients
  • 1 Head of Cauliflower
  • 1/4 c. Butter (maybe more- Excellent with Kerry Gold!)
  • Salt & Pepper to taste
  • 1 T Nutritional Yeast Flakes
  • 1/8 tsp Xanthan Gum
  • 1/2 tsp Garlic Powder
  • 1/2 tsp Chickens Soup Base( I like Orrington Farms)
  • 1.5 – 2 Tsp Parsley
Directions:
  • Chop Cauliflower into even sizes florets.
  • Steam Cauliflower for about 10 min or just under fork tender.
    • Steaming too long will make the end result very watery
  • Place Cauliflower and butter into a food processor
  • Blend until smooth
  • Add in the remaining ingredients and mix well
  • ENJOY!
0


I have read several different options for making apple pie and I have been eagerly looking forward to trying the different options. I have listed both options below as they are both very tasty and make a great dessert. I do feel, however, that the Chayote makes a closer 'Apple Pie' texture than the Jicama does.

The flavor of both are phenomenal though!

I did only make the filling and did not make a full apple pie with crust etc. So I have listed the fillings below. Once I try a crust I will list this as well.

As with most of my recipes, I want to give the original poster credit.
I obtained both recipe from Low Carb Yum. If you want to peruse her comments regarding the recipe you can access the Chayote Recipe  and the Jicama Recipe by clicking on the links.


Chayote Recipe

This recipe would be PERFECT for apple pie or any other recipe that calls for baked apples. Perhaps even baked apple cake, or baked apple bread! The texture is very similar to that of baked apples and the flavor is fantastic!

Ingredients
  • 5 medium chayote squash
  • 3/4 cup sweetener
  • 1 tablespoon xanthan gum
  • 1 tablespoon lemon juice
  • 2 teaspoons apple extract
  • 1/3 cup butter cut in small pieces
  • 1 tsp Apple Pie Spice
    • Alternate options to this would be to use a blend of 
      • Cinnamon
      • Cloves
      • Nutmeg
Directions:

  1. Peel chayote and cut into slices.
  2. Boil sliced chayote until fork tender. Drain. Return to pot.
  3. Add sweetener, xanthan gum, lemon juice, and apple extract to cooked chayote squash and Apple Pie Spice.
  4. Add Butter and mix together once melted


Jicama Recipe

The Jicama recipe I had cooked a lot longer in hopes to cook out some of the 'crunch' from the jicama. There jicama carmelized and the crunch never did dissipate. It was more like eating a fresh unbaked apple with a baked apple taste. Still very good, but not sure I would want this option for a pie. It was fantastic with cool whip!

Ingredients
  • 4 cups jicama chopped
  • 1/2 cup Swerve
  • 1/2 cup butter
  • 1 tablespoon cinnamon
  • 1/4 teaspoon nutmeg
  • 1/8 teaspoon cloves
  • 2 teaspoon apple extract
  • 1 teaspoon vanilla extract

Directions:
  1. Combine chopped jicama with butter, sweetener, and spices in a pan.
  2. Cook and stir over medium heat until jicama has softened.
  3. At end of cooking, stir in apple and vanilla extracts.
  4. Serve warm.
  5. Can be refrigerated for up to a week or frozen for several months.
0


 I needed to find something other than eggs for breakfast. Something that I could grab, on the go that actually tasted good. Something that I could change up with different flavors if I wanted to.

I found this recipe!  I stumbled across this from SlenderKitchen. I follow several blogs on facebook and often I see so many I have to try. I am very very glad I tried this one. I have made these about 4-5 times now and this time I made a double recipe.

I would love to hear about your experiences with this recipe along with what you decided to add to change it up!

I tweaked her recipe slightly to just add in some berries.

Image represents a double batch

Ingredients:
  • 6 eggs
  • 4 tbsp. melted butter 
  • 4 tbsp. melted coconut oil 
  • 1/4 cup almond milk ( I used unsweetened coconut milk)
  • 1.5 tbsp. vanilla extract 
  • 1/2 cup sugar substitute, granulated 
  • 2/3 cup coconut flour 
  • 1 tsp. baking powder 
  • 1/2 tsp. salt 
Addition Options
  • 1 cup of berries- your choice
    • If berries are frozen and rather juicy may need to add a couple TBL spoons more of coconut flour - start with one T at a time.

 Directions:
  1. Preheat the oven to 375. 
  2. Whisk together the eggs, butter, coconut oil, almond milk, vanilla extract, and sugar substitute. 
  3. In another bowl, whisk together the coconut flour, baking powder, and salt. 
  4. Slowly add the coconut flour to the wet ingredients and stir to incorporate. 
  5. The batter will be thick. fold in any additions (Berries etc)
  6. Pour into prepared standard muffin tin. 
  7. Bake for 20-25 minutes until cooked through.
    • Depending on your Muffin Size you may have to cook this longer.


The Nutrition Values below include 1 cup of Blueberries and the use of coconut milk in place of the almond milk. 


0

Found this recipe from one of my favorite bloggers (All Day I Dream About Food). She comes up with some fantastic things!

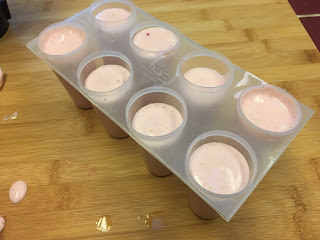
My husband was actually pushing me to make these for a few days so I finally made them! I have to say they are absolutely delicious! Shared them out with some friends and they were huge fans as well. The best thing - they are super easy to make and the recipe makes quite a bit! With the mold that I have I could have made about 8-10 more with how small the Popsicle are.

Hope you all enjoy this one:) Especially now that warm weather is approaching!  They have a lemon strawberry flavor that is very refreshing!

These went too fast and I did not get a finished picture but I know I will be making them again! :)

Ingredients:

  • 8 oz cream cheese, softened
  • 1 cup cream
  • 1/3 cup powdered Swerve Sweetener or other powdered erythritol - I used a little swerve and a little truvia. Niether were powdered. I just ran them in the blender for a little bit
  • 1/4 tsp stevia extract
  • 1 tbsp lemon juice
  • 2 tsp lemon zest
  • 2 cups fresh strawberries, chopped, divided

Directions:
  1. Place cream cheese in a food processor and process until smooth. ( I used a blender- The processor would probably worked a bit better, but if you don't have one, the blender will still work)
  2. Add cream, powdered erythritol, lemon juice, lemon zest and stevia extract. Process until well combined.
  3. Add 1 1/2 cups of the strawberries and process until almost fully smooth. Stir in remaining chopped strawberries.
  4. Pour mixture into popsicle molds and push popsicle sticks about 2/3 of the way into each (I recommend getting wooden sticks, as they tend to grip the mixture better and don't come out when you are trying to unmold the popsicles).
  5. Freeze at least 4 hours. To unmold, run under hot tap water for 20 to 30 seconds, and then twist stick gently to release.

NUTRITION - Taken from the blog listed above

Serves 12. Each serving has 3 g of carbs and 1 g of fiber. Total NET CARBS = 2 g.

122 Calories; 12g Fat (83.6% calories from fat); 2g Protein; 3g Carbohydrate; 1g Dietary Fiber; 38mg Cholesterol; 63mg Sodium


0

I have been craving chocolate for the last few days. ( Or always lol) and came across a post for Chocolate cake from Low Carb Yum. The comments on the post were incredible so I had to try it for myself.

Don't let the ingredients deter you. You cannot tell that there is Zucchini in this at all and it is incredibly moist! Its just like box cake but BETTER! 😁

I also found a recipe for the Coconut frosting that goes perfecting with German Chocolate Cake. And it is great! I can't say enough good things about these recipes.

I unfortunately did not take as many pictures as I normally do so hopefully I will remember to take pictures next time I makes this. I can guarantee that this will be made again!

Ingredients

  • 1 cup coconut flour
  • 1 cup unsweetened cocoa powder
  • 3/4 cup artificial sweetener
  • 1/4 Truvia
  • 1 teaspoon cinnamon
  • 2 teaspoons baking soda
  • 2 teaspoons baking powder
  • 1/2 teaspoon sea salt
  • 1/2 cup coconut oil melted
  • 8 large eggs beaten
  • 2 teaspoons vanilla extract
  • 4 cups zucchini shredded

Directions:

  1. In large mixing bowl, combine coconut flour, cocoa, sweetener, cinnamon, baking soda, baking powder, and sea salt.
  2. Mix in eggs, coconut oil, and vanilla until well combined.
  3. Stir in zucchini 
  4. Spread out into greased 9x13-inch pan (or two round 9-inch pans).
  5. Bake at 350°F for about 40 minutes or until toothpick inserted in center comes out clean.
  6. Cool on wire rack. Once cool, frost with desired frosting.

There are many different  frosting options available however I only made the coconut frosting as it is one of my favorites on this kind of cake. 

Pecan Coconut Frosting - From Low Carb Yum
(I have doubled from the original recipe provided by Low Carb Yum to cover the 9x13 cake) 

Ingredients  
  • 1 cup unsweetened almond milk
  • 1 cup sweetener I used Swerve Confectioners Powder
  • 2 egg yolk
  • 1/2 cup butter
  • 1/2 teaspoon xanthan gum optional
  • 1 teaspoon vanilla extract
  • 1.5 cup unsweetened shredded coconut
  • 1 cup chopped pecans
Directions: 
  1. Combine almond milk, sweetener, egg yolk and butter in a saucepan.
  2. Heat over medium heat. When bubbles form, sprinkle in xanthan gum.
  3. Continue heating until thickened.
  4. Remove from heat and stir in vanilla, coconut and pecans.
  5. Spread mixture over cooled cake.


The Cake recipe yields 24 servings and the frosting is plenty enough for the entire cake.

Frosting Nutritional Facts

Cake Nutritional Facts


0

I had so many doubts when it came to this recipe. With a Cheese base, I expected it to be soggy, wilted and greasy. I am happy to say I was WRONG!

This is easily THE best pizza crust I have ever had that is low carb. It tastes just like regular pizza crust. It has structure, rigidity, crunch, flavor, and is extremely close if not exactly like store bought frozen pizza. (Depends on the kind you typically buy, of course 😉.

Note: It looks burnt - but it was perfect! Don't like the color, lessen the bake time :)

Recipe obtained from DitchtheCarbs.com Ingredients

  • 170g / 6oz / 1 3/4cups pre shredded/grated cheese mozzarella is the best or Edam/mild cheese
  • 85g / 3oz / 3/4cup almond meal/flour
  • 2 tbsp cream cheese
  • 1 egg
  • pinch salt to taste
  • Seasonings to taste ( I used Basil, Oregano, Onion Powder)


Directions
  1. Mix the shredded/grated cheese and almond flour/meal in a microwaveable bowl. Add the cream cheese. Microwave on HIGH for 1 minute.
  2. Stir then microwave on HIGH for another 30 seconds.
  3. Add the egg, salt, rosemary and any other flavourings, mix gently.
  4. Place in between 2 pieces of baking parchment/paper and roll into a circular pizza shape (see photos above). Remove the top baking paper/parchment. If the mixture hardens and becomes difficult to work with, pop it back in the microwave for 10-20 seconds to soften again but not too long or you will cook the egg.
  5. Make fork holes all over the pizza base to ensure it cooks evenly.
  6. Slide the baking paper/parchment with the pizza base, on a baking tray (cookie tray) or pizza stone, and bake at 220C/425F for 12-15 minutes, or until brown.  ( I have a gas stove and did 10 min. So I would probably keep an eye on it at 7-8 min and go from there)
  7. To make the base really crispy and sturdy, flip the pizza over (onto baking paper/parchment) once the top has browned.
  8. Once cooked, remove from the oven and add all the toppings you like. Make sure any meat is already cooked as this time it goes back into the oven just to heat up the toppings and melt the cheese. Bake again at 220C/425F for 5 minutes


Recipe Notes

Fat Head pastry can also be made by replacing the almond meal/flour with 1/4 cup (4 tbsp) coconut flour.
Nutrition panel is for base only as toppings will vary widely depending on what was added and how much.
Nutrition Facts below taken from SparksPeople Analyzer and reflects the nutrition facts for the entire crust. This does not include sauce or toppings.


0

I found this recipe from The Primitive Palate. I was EXTREMELY skeptical that they would even be good considering the ingredients. I still am fairly impressed. I read a large amount of comments on the blog before deciding that all the good news was worth giving the recipe a try. The recipe makes about 12-15 tortillas.

These end up being pretty sturdy and don't really fall apart at all. To be safe we still lined the tortilla with a leaf of lettuce, but I don't think it was necessary. The optional seasonings compliment taco's REALLY Well, though without the filling the seasoning in the tortillas can be a bit strong.

Ingredients

  • 4 oz. Hot & Spicy Pork Rinds (regular work just fine, too)
  • 1 (eight oz.) package cream cheese, softened
  • 8 eggs
  • 1/3 cup water
  • 1 tablespoon granulated garlic (*optional)
  • 1 tablespoon ground cumin (*optional)


Directions:

  1. Place pork rinds into a food processor and blitz for about 10 seconds, until they are dust. 
  2. Add all other ingredients to food processor and blitz for about 45 more seconds. Until you have a nice smooth batter.
  3. Preheat an electric griddle to high. (Using a non-stick pan on the stove top would work also, I would just set the heat to medium-high)
  4. Spray cooking surface with a little spray oil (I use either coconut oil or olive oil spray) and pour 1/3 cup of batter onto griddle.
  5. Gently spread the batter as thin as you can with a rubber spatula and cook for about 2 minutes or until golden brown.
  6. Flip tortilla and continue to cook for about 45 more seconds.
  7. Repeat with the rest of the batter.

*These tortillas can be made ahead and wrapped in plastic, or stored in the freezer!

I have not been able to find a recipe analyzer that can locate pork rinds or chicharrones for pork.  I do know that this is a VERY low carb recipe. I will continue to look for something that can provide a proper analysis . 
0

Before being diabetic I hated chocolate. About 2 months before being diagnosed my chocolate loving switch was flipped and of course now that I am diabetic - it's not the best thing in the world for me.
I've never been much for fudge and I have never made a regular batch of fudge either. But this stuff is actually pretty darn good!

It is very rich so small pieces are plenty!
I obtained this recipe from lowcarbyum's blog.

INGREDIENTS

  • 2/3 cup powdered sweetener (Sukrin Melis* or Swerve Confectioners) I used a combination of powdered swerve and straight erythritol.
  • 1/2 cup peanut butter
  • 1 teaspoon vanilla extract
  • 1/4 cup coconut oil or ghee
  • 1/4 cup coconut milk
  • 1 1/2 tablespoon cocoa


INSTRUCTIONS

  1. Line a small container with parchment paper. (I used 7.5 x 5 size)
  2. Place sweetener, peanut butter, and vanilla extract in medium bowl. Set aside.
  3. Mix coconut oil, milk, and cocoa in small saucepan. Bring to a boil.
  4. Pour hot mixture over the ingredients in medium bowl. Stir until well combined.
  5. Spread into prepared container. Allow to cool in refrigerator. Slice into squares. Store in the fridge.


Nutrition facts are from the blog I obtained the recipe from. It is always good to recheck nutrtion facts for yourself. 
Makes 28 small squares (about 3-4 squares per serving)

Nutrition per square: 50 calories, 4.8g fat, 22mg sodium, 1.2g carbs, 1.2g protein, 5.7g erythritol
0

I don't have a clue what to call this. I had a craving and threw it together and all I can say is " YUM!" to the nth degree. Absolutely delicious. And I'm sure my heart will agree regardless of all the butter and cheese.  All Measurements are approximate. I made it on a whim and should have written down what I put in and actual amounts.


Ingredients:

  • 2 lbs Mushrooms
  • 1.5 -2 lbs Chicken 
  • 1/4 c. Butter 
  • 1-2 Onions Sliced
  • 2 oz Cream Cheese
  • 1/2 pint Heavy Whipping Cream
  • 1/4 C White Wine
  • Salt
  • Pepper
  • Garlic Powder
  • Onion Powder
  • Basil
  • 1/4 c. Minced Garlic
  • 2 Cups Mozzarella Cheese
Directions:

  • Melt 2 T. Butter in a large skillet and add minced garlic
  • Set chicken in the pan and add White wine, Sprinkle lightly with Garlic powder, Pepper, Salt, Onion Powder and Basil. 
  • Set Stove on Med. Low and cover. Let chicken cook for 5 min then turn and cook another 5 min.  Lightly season again. 
  • Remove Chicken and place in 9x13 Pan leaving any remaining butter seasonings etc in the pan. 
  • Drop Remaining butter, Mushrooms and Onions in skillet. Cover and cook for 5-10 Min - Stirring occasionally. 
  • Scoop Mushrooms and place in the 9x13 pan with the chicken, leaving seasonings and butter in the skillet. 
  • Place 9x13 pan in oven at 350 while making the white sauce 
  • Pour Heavy Whipping Cream into Skillet and cook down. Add cream cheese. 
  • Once mixture is combined thoroughly pour over Mushroom and Chicken
  • Cover with Mozzarella Cheese and Continue Baking until Chicken is done.
Eat and enjoy the wonderful deliciousness that is garlic, creamy, mushroom mozzarella chicken. 
As an afterthought - It would be really good to add about 1/2c parmesan cheese to the sauce.

Servings: 6
Carbohydrates: 10.46g
Fiber: 2.6g
Sugar: 4.84g
Calories: 359kc
Protein: 45.42g
Fat: 15.69g

0

I have tried another English muffin recipe but did not like the flax seed taste. The nice thing about this recipe is no flax seed taste!  It is very simple to make and has oven directions as well.  I found the recipe originally from beautyandthefoodie.com


 The cons:
  •  It does have a slight eggy smell and eggy taste when not put with anything. For example - just butter. But I tried it with peanut butter and did not notice the eggy taste at all. 
  • It is very soft.  - Even toasted there is not really any crunch to it. I love my crunch. This isnt a horrible con but figured I would point that out. 
Don't take my word for it though - Try it yourself - there are many more pro's than there are con's. Let us know what you think!

Ingredients:
  • 1/2 TBSP butter or coconut oil, melted
  • 1 TBSP Coconut flour
  • 1 TBSP Milk (Unsweetened coconut, almond milk, half and half)
  • 1/8 tsp Baking Soda
  • 1/4 tsp Apple Cider Vinegar
    • 1/2 tsp baking powder can be used in place of the baking soda and apple cider vinegar
  • Optional Items:
    • 1 Pinch Sea Salt
    • 1/4 tsp honey or 6 drops liquid stevia  (If omitting sweetener use full fat canned coconut milk for milk option)
    • 1/8 tsp Vanilla - for sweeter muffins.
Directions: 
  • In a small dish mix the baking soda and apple cider vinegar
    • If using baking powder, mix the coconut flour with the baking powder
  • In a ramekin, melt the butter
  • Add in the remaining ingredients and mix well. Press out any clumps and scrape down the sides. 
  • Cook in microwave for 1:30 - 2:00 minutes. (Until center is firm)
    • If baking in the oven - 400 degrees for 12-15 minutes
  • Cool well to handle 
  • Cut in half and toast in a buttered or oiled pan - Important step
    • I have not tried just putting them in a toaster - but this may be an optional alternative


** Please Note - this does not include option ingredients. 
**Listed nutrition is using coconut oil and unsweetened coconut milk

0

I love lemon bars but there are so many recipes out there that are either too tangy or too high carb or too sweet.  I think I finally found one that is perfect. The only thing I think I would change is the crust slightly - Its a bit crumbly. Still good though.

I did modify the recipe I made slightly to avoid the tangy flavor. So what you see is the what I did.

For the Crust:
  • 6 Tbl butter
  • 2 cups almond flour
  • ⅓ cup granulated sugar substitute 
  • 2 Tsp Lemon Extract

For the Filling:
  • ½ cup butter
  • ½ cup granulated sugar substitute 
  • ½ cup fresh lemon juice
  • 2 tsp Lemon Extract
  • 6 egg yolks
  • ½ tsp xanthan gum
  • 2 Tbsp unflavored gelatin 
  • 1/4 C Powdered Erythritol (If you have granulated you can grind it to powder)
Direction:

For the crust:
  1. Melt the butter in the microwave or a small saucepan. 
  2. Add the almond flour, sweetener, and lemon extract, stirring until fully combined. 
  3. Press the dough evenly along the bottom and ½ inch up the sides of an 8 x 8 inch square pan.
  4. For best results line the pan with parchment paper or foil first, then you can simply lift out the completed lemon bars. ( I did not line the pan)
  5. Bake at 350 degrees (F) for 10 minutes. 
  6. Remove and cool while you make the filling.

For the filling:
  1. Melt the butter in a small saucepan on low heat. 
  2. Remove from heat and whisk in sweetener, lemon juice, and lemon extract until dissolved. 
  3. Whisk in the egg yolks and return to the stove over low heat. 
  4. Whisk continually until the curd starts to thicken. 
  5. Remove from the heat and strain into a small bowl. 
  6. Whisk in the the xanthan gum and gelatin until dissolved and smooth.
  7. Pour the filling over the pre-baked crust and spread out evenly to the edges of the pan. 
  8. Bake the bars at 350 degrees (F) for 15 minutes. 
  9. Remove and cool. 
  10. Sprinkle with Powdered Swerve before serving if desired. 
  11. Cut into sixteen 2 x 2 squares.


The filling would also make an excellent filling for Lemon Meringue Pie. Though I would add more sweetener to the filling since we would not be adding in the powdered erythritol.


Nutrition Facts Per Serving:

  • Calories: 197.9
  • Fat: 18.7g
  • Carbs: 8
    • Fiber: 1.6
    • Sugar Alcohol: 3g
    • Sugars: 1.7g
    • Net Carbs: 3.4g
  • Protein: 4.6g


0


(Recipe obtained from finecooking.com)

This recipe was originally listed for Halibut. I tend to like my Cod so, that is what I made this with.
This is easily one of my favorite recipes. It has such a light and fresh taste. It is very filling too!

The recipe has mint added to the spinach which I originally thought it would not be good together. I haven't used a lot of mint (really ever) in savory meals.  It really adds to the flavor and I don't know that eliminating anything in the recipe would keep the flavor the same. It is truly a delicious meal that I will be making many more times!

Ingredients
  • 2 tsp. finely grated fresh ginger
  • 1 tsp. finely grated garlic
  • Finely grated zest and the juice of 1 lemon
  • 2 Tbs. plus 1 tsp. extra-virgin olive oil
  • Kosher salt and freshly ground black pepper
  • Four 1-inch-thick skinless halibut fillets, 6 to 8 oz. each (I used Cod instead)
  • 2 medium leeks, white and light-green parts only, halved lengthwise, rinsed well, and thinly sliced
  • 3 cups lower-salt chicken broth or vegetable broth; more as needed(I used 3 cups of hot water and 2.5 Tblsp of soup base powder)
  • 4 cups lightly packed spinach leaves, rinsed and roughly chopped
  • 1/4 cup roughly chopped fresh mint
  • 1/4 cup thinly sliced scallions
Directions:


  1. In a small bowl, mix the ginger, garlic, lemon zest, 1 tsp. of the olive oil, 1 tsp. salt, and 1/2 tsp. pepper. Pat the mixture evenly all over one side of the fish. 
  2.  In a 10-inch straight-sided saute pan, heat the remaining 2 Tbs. oil over medium heat. Add the leeks and saute, stirring constantly, until softened, about 5 minutes. 
  3. Add the broth and 1 Tbs. of the lemon juice. Cover and bring to a simmer over high heat. 
  4. Arrange the fish lemon-ginger side up in a single layer on top of the leeks. If necessary, add more broth until the fillets are almost but not completely submerged. Cover and turn the heat to low. 
  5. Gently simmer until the fish is just cooked through, 8 to 10 minutes. 
  6. With a slotted spatula, transfer the fish to 4 shallow bowls. 
  7.  Add the spinach, mint, and scallions to the broth and stir until slightly wilted, about 1 minute. 
  8. Season to taste with more lemon juice, salt, and pepper. Ladle the vegetables and broth around the fish and serve.

The nutritional data for this is listed with the Halibut. - When we made this with cod we ate about 3-4 oz of Cod with the serving. (Nutritional Data obtained from https://happyforks.com)

Recipe listed makes 4 servings - Details below show data per serving.


0

Every time I go to the store I get irritated at all of the sugar that is put into yogurt. The best I have always found was about 15g of carbs and almost all of that being sugar.


I finally found something different. It takes a little getting used to as the taste is quite a bit different and so is the consistency. My husband describes it as 'flavored sour cream'. After about 2 -3 of these, its not bad at all. It doesn't hold the overly sweet taste that other yogurts have. It also has natural sweetener instead of artificial. To top that - it has fiber as well!


15g of Carbs
 -- 6 of these are Fiber
 -- 7 of these are Sugar

I see all perks and no drawbacks :)

The flavors do seem a bit limited as far as what I can find in the store but at this point, we should all be used to that. ☺ Their website lists several different flavors available in the 'Zero' line of yogurt.
I've listed these below, but to ensure you are getting up dated information here is the link to their website too.


Nutrition Facts listed are for the Vanilla Flavored Yogurt


0